Thursday 4 November 2010

Wheel Arches

Hi there,sorry I haven't been on here for the last few weeks but we have been busy working on the camper.
When we bought the CF we were going to have the wheel arches cut out and replacements welded in, but when we enquired about the cost we decided that it would be better left untill later and got the filler out!
 The nearside rear arch looked the worst so I attacked that first, after an hour or so with the wire brush and an orbital sander the rust had gone, and so had most of the arch lol
You can see the rust on the floor and this was before I really got going.


But after a while and quite a bit of fillerthe results are not too bad!

before                                                                            after

The offside was in a similar condition but after a little work and even more filler the results aren't too bad.
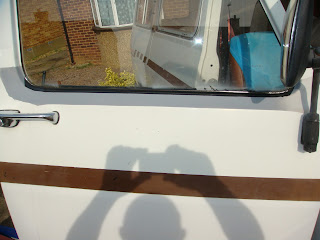
 The doors had a little bit of rust on the tops which was easily delt with and the bottoms had been done before so only neaded a bit of tidying up.

 
The door tops have since been painted and look as good as new.
The next job was taking the old girl for her m.o.t which she passed with flying colours and only 1 advisary, the os front brake was binding slightly, which was a sticky wheel cylinder and easily delt with.
I will be back soon with more updates, the next job will be relaceing the front seats with a pair from a Vauxhall Omega.

Tuesday 21 September 2010

The brakes

Hello everybody here we are again. I have been back out to the van and have sorted the brakes which weren't too bad.
On inspection I discovered that the off side hand brake cable had seized, I realised there was a problem with the hand brake the day after it was dropped off, when the van rolled down the drive and into the garden wall, with me sitting in the back! So I got a replacement but as this was a pattern part, there was a bit of fettling to get it to fit. The problem was that the ball that fits into the union to join the two rear cables was too big so after a few minutes with a small file it all went together well.
With the brake drums off I could see that the linings were all fairly new.

So all they needed was a clean up but the rear o/s wheel cylinder had seized so it was off to the spares shop to order a new one. Also the front o/s had a sticky cylinder that needed a little bit of cleaning before it would move freely but once done it was as good as gold.
With all the drums back on we bled the system through with nice clean fluid and now they feel fine, but the only way to see if they are as good as they feel is when it goes up for the M.O.T.
The next job is going to be the rusty wheel arches, so watch this space!.
Cheers and I'll be back soon.

Sunday 12 September 2010

Getting the roof sorted

roof open with panel missing
The first job to be sorted was the roof, which we found almost impossible to raise. So after a quick chat with the previous owner,in case there was a knack to it, he told us that it had always been hard work and was a 2 person job so we just heaved it up. The front of the roof went up easily but the rear section just wouldn't budge at first then it parted company from the rest of the roof!

On closer inspection we saw that the roof ends folded on 3 piano type hinges and  2 of these had seized solid.
We removed the complete rear end of the roof and put them in the garage over night sprayed liberaly with WD40.

On closer inspection we saw that the internal lining of the roof was soaked so we decided that as the weather was lovley and warm with a light breeze, we would leave the roof open for a couple of days to dry out.

dirty channel
We then decided to investigate why the roof had got wet and soon found that the channel that the roof sits in when it is down, was full of muck which had blocked the drain points and had the effect of making a moat for the roof to sit in!

So we cleaned out the channels, removed the drain covers cleaned then replaced them and then set about freeing the hinges off.
This took a couple of hours of wire brushing and then working them back & forth in a vice until they were nice and free. The hinges will be replaced when we can find some brass or stainless replacements.The top end of the back panel is screwed to the internal lining ot the roof but where this had got wet it has made it too soft to re-attach the back panel, so for now we have used some plastic 2 way block fittings to do this , but we will probably have to remove the roof next year so that we can reline it with some new ply wood all the way through.
So the roof is now back on and working, so the next job will be the brakes.
See you next time, Derek & Lyn

Friday 10 September 2010

Buying the camper

Hello there, I was going to do some bits on the van today but it has started to rain so I thought I'd come and update the blog.
The reason we decided to buy a camper van was so that we could get away for the odd weekend wth the dog without going through the grief of have to explain to B and B owners that the dog was well behaved and wouldn't chew their house up. Or having to pay stupid prices for a weekend in a run down cottage with damp running down the walls and no heating just because thats the only place we could rent that would allow dogs.
So we started by having a look around the local campervan sales places, but soon realised that their prices were an awful lot more than we could afford. So the next idea was to buy an older panel van, Transit or LDV, that we could convert but once again we found that the only ones we could afford were either ex builders vans that had taken more beatings than the average ginger step child or were ex courier vans that had done moon miles!
So there we were looking on ebay when we spotted an advert for a 1983 CF Bedford Trailblazer with an elevating roof that looked like the sort of van we could get on with, the main reason for this was the fact that we could afford it!
The advert stated that it had not been used for a couple of years and had a few issues, mainly with the bodywork, and the fact that the roof got a couple of problems at the rear end. So we contacted the seller and made an oppointment to go and see the van on the following Saturday. The seller said that he wouldn't be there but the keys would be left behind the cottage under a brick. When we arrived the van was sitting in the sun looking a bit neglected. After locating the keys, we had a good look round,got the engine running and decided that this was the van for us. We contacted the seller,agreed a price and sent off the cheque.
The next thing was to arrange collection of the van,which was in Suffolk, 110 miles away from us in Bedfordshire.
So we had a look at the various options to get it home, towing it or hiring a trailer or take a chance and drive it home but eventually decided that the best way was to have it collected by a recovery company. So we asked around and were given the number of a local firm, who when asked gave us a price of £165 to bring the old girl home the following thursday.
So Thursday morning arrived and at the alloted time I went up to the recovery firms depot to meet the driver and go get the van. When I got there the recovery driver asked if I knew the way or should we put our faith in the magic of Tom Tom. I replied that I had bought a map and handed it over only to see his face drop. He quickly dissapeared upstairs to his office and returned a couple of minutes later saying that he hadn't realised that it was that far, even though we had given him the postcode when we first contacted him, and the price would now be £350!!!!
Needless to say we parted company soon after with the van still sitting in Suffolk and us no closer to getting it to Bedfordshire.
I then thought that I had better let the seller know that there was a problem only for him to tell me that his local garage did recovery and he would get us a price. He called me back a few minutes later with the price of £170 and said that it could be delivered that evening,.
Well I couldn't say no could I?
So at 7.45 pm we took delivery of our first camper.

Now, we have been told that there is quite a following for the CF Bedford and there is quite a good site devoted to the ownership of said vans, so we soon tracked it down and became members.
http://www.bedfordcf.co.uk/
Well that enough for now, I'll be back soon with further updates.
Cheers ,Derek

Wednesday 8 September 2010

Lets start at the begining

Hello there, if there is anybody there, welcome to my blog.
This is hopefully going to be an account of the restoration of our 1983 CF Bedford camper.
We are not going for a full concours type of restoration just enough so that we can put the van back on the road and be able to use it for weekends away and still be able to park it in the supermarket carpark with out worrying if it has been damaged by a runaway trolly.
We bought the van a couple of weeks ago through ebay and had it collected from Suffolk and brought to our home in bedfordshire. This in its self proved to be harder than expected as the recovery company that we first contacted to do the job gave us a resonable quote but on the morning of recovery they decided that they had misscalculated and told us that it had more than doubled in price!
This would have meant that the recovery would have cost almost much as the van!
Well thats the start, I will be back later with some of the pics that we have taken so far and a bit more info on what is required to put the old girl back on the tarmac.